

Showing posts with label Tips and Tricks. Show all posts
Showing posts with label Tips and Tricks. Show all posts
I know many people like to make jar bookmarks of their sites. Many bloggers and webmasters use this method to promote their product. Many people know how to make jar bookmark or you can say java launcher. People know to do all the stuff but they don't share it with anyone. When I was in wapka I always helped anyone. My username in wapka was surfit. I always shared the most wanted code never asked for any reward. I am not bragging about myself.

READ MORE
Why Need a Bookmark
If you make a jar or sis bookmark then you can upload it on different public share websites. People will download it and your website will become more popular. Your application will put good impression of your site.Tutorial List
Let me tell you what you going to learn through this tutorial.- Making Symbian Bookmark (.sis)
- Making Dynamic Jar Bookmark
- Making Simple Jar Bookmark
Things you Need
before we start tutorial, let me tell you how many software you need. Read our previous post about 15 apps that we use in mod.- Hack your Mobile
- X-plore (or any other file manager) s60v3
- ZntxHan v2.06 EN s60v3
- JarBoom v3.00 s60v3
- SisEditor
- Get Svg S60v3
- All Editors s60v3
- A Working Brain ^^,
Making Symbian Bookmark (.sis)
Let me start from Symbian bookmark. We need already created bookmark to use it in our project. You can download my blog symbian bookmark here.- Extracting Files - You need to extract my blog bookmark on any specified place. Open SisEditor and extract files.
- Extracted Files - You will find these files in my blog bookmark.
- PakPDA_0xA00158A5_reg.rsc
- PakPDA_0xA00158A5.rsc
- PakPDA_0xA00158A5.mif
- PakPDA_0xA00158A5.exe
- Editing Files - Use zntxHan and open these files and edit my blog name and put yours. Leave PakPDA_0xA00158A5.mif file, because it’s an icon file.
- Text characters must not exceed, this is the most delicate part where people make mistakes. If have left enough space my blog url, you will not feel any problem.
- Deleting old .bak File - Every time you edit file with zntxHan it will create a backup file in same directory. Old file will have .bak extension, you can delete it.
- Making .mif Icon - Now create an icon in paint/Photoshop. Icon size must not exceed 48x48 or 32x32 in some cases. If you make a transparent icon then you must create it .png or .gif extension.
- Converting to .Svg - You have to you use an application named Get SVG. Download it, install it and open it. Now use this app and convert your .gif icon that you created above. Converted file must have .svg extension.
- Converting .Svg to .Mif - Now we will you All Editors to convert .svg file to .mif check these screenshots to understand.
- Final Packing - Now use SisEditor to pack all files. Change necessary data before you pack it. Everything must be handled carefully.
- Installing Bookmark - Congratulation, your bookmark is ready. If everything was ok, then you will not face any problem while installing.
Making Dynamic MakePack Jar Bookmark
Why I used the word dynamic, because in this bookmark you can add multiple menu link. Check this screenshot and download my blog jar bookmark to use it in your project.
- Extracting Files - Use X-Plore and Extract all files into a specified folder.
- Editing Files - Now you will find two .xml files named.
- appinfo.xml
- sarakuj.xml
- Editing Icons - I created all icons for my blog, you can use different icons. Create new icons and put change icon names in sarakuj.xml
- Packing Files - Now Use JarBoom and pack your files. To pack jar file, open JarBoom > options > Jar - File > Compress and locate the MANIFEST.MF file. Your compressed file can be found in C:\JarBoom.
- Installing File - I know you have done everything perfectly. Install packed file and open it.
Making Simple Jar Bookmark
Why I call it simple bookmark because if we open it, it will simply redirected us to our website. It doesn't have any menu, icon etc. You can call it Quick Launcher. I call it Sarakuj Quick Launcher. Hehe. You have to download my Sarakuj Quick Launcher to use it in your project. Let start the tutorial.- Extracting Files - Use X-Plore and Extract all files into a specified folder.
- Editing Files - Now you will find two .xml files named GameMidlet.class. Use znxtHn, open that file and edit this file. Put your site name and replace my site name with your site name.
- Understanding MANIFEST.MF file - Let me tell you what are the important things to edit them in a good way.
Manifest-Version: 1.0
Ant-Version: Apache Ant 1.6.5
Created-By: 1.6.0-b105 (Sarakuj.)
MIDlet-1: Sarakuj,/icon.gif,GameMidlet
MIDlet-Vendor: Sarakuj.com
URL_OPEN: http://www.sarakuj.com/?m=1
MIDlet-Name: Sarakuj
MIDlet-Version: 1.01
MicroEdition-Configuration: CLDC-1.0
MicroEdition-Profile: MIDP-2.0 MIDlet-Info-URL: http://sarakuj.com/?m=1/
MIDlet-Description: One Stop Blog
MIDlet-Delete-Confirm: Delete Sarakuj?
MIDlet-Delete-Notify: Successfully removed.- You can say Author name
- Your site name, it’s used in GameMidlet.class
- Application name after installation.
- Packing Files - Now Use JarBoom and pack your edited files. To pack jar file, open JarBoom > options > Jar - File > Compress and locate the MANIFEST.MF file. Your compressed file can be found in C:\JarBoom.
- Installing File - I know you have done everything perfectly. Install packed file and open it.
Before You Go
Please Note: The applications we used in this project are python application. To run python applications you need Final Python Installer v3.00. If any file doesn’t work after installation, then install it in C:\ drive and try it. Comment below if you face any problem. Thank you :)
Youtube is the online video sharing website, we all know that. There is no direct way to download YouTube videos, you have to use unusual software and downloader like YouTube downloader, IDM etc.
I use Opera mini for mobile and Opera for browsing on my computer, as you know download managers only work with Internet Explorer or Mozilla Firefox. Most of them ignore Opera browser, but I cannot ignore my Opera. I love it and always wil. Maybe IDM has added downloader feature to Opera as well. Anyway let me share this amazing idea.
Some good day I was searching extensions for Opera browser on my computer. I found a very useful Opera extension named SaveFrom.Net. This is really an amazing tool to download YouTube videos. It also supports other major websites.
I know we feel very bad when we see any video and we are unable to download it. If somehow we download it from our computer then we are not able to convert it in to any other format. YouTube videos are hard to convert, and most mobiles don't support flv files.
Let me tell you the easiest method to download and convert YouTube videos. 
I know that there are so many people out there who don't have a mobile which supports copy paste feature. Let me modify the above method for you.
If you don't want to go through the above method then you can try tubidy.mobi. This is a very good site to download YouTube videos. You can download mp4, 3gp Hi, 3gp Low, mp3 and mp4 audio formats. You can also download video in parts.
There is not any software for symbian mobile phone which can download YouTube videos. If you see any software like this don't download it. It can be a bookmark of any other mobile site, or maybe a virus. I have tested much software, barely there is any software which I forgot to use.
www.savefrom.net is a very unique website which supports almost all major website. You can download videos and files from these websites.
READ MORE
I use Opera mini for mobile and Opera for browsing on my computer, as you know download managers only work with Internet Explorer or Mozilla Firefox. Most of them ignore Opera browser, but I cannot ignore my Opera. I love it and always wil. Maybe IDM has added downloader feature to Opera as well. Anyway let me share this amazing idea.
Some good day I was searching extensions for Opera browser on my computer. I found a very useful Opera extension named SaveFrom.Net. This is really an amazing tool to download YouTube videos. It also supports other major websites.
Download YouTube Videos from Mobile
I know we feel very bad when we see any video and we are unable to download it. If somehow we download it from our computer then we are not able to convert it in to any other format. YouTube videos are hard to convert, and most mobiles don't support flv files.
Let me tell you the easiest method to download and convert YouTube videos.
- Go to http://m.youtube.com
- Open any video that you want to download
- Copy the link of the video, the link will be something like this http://m.youtube.com/watch?hl=en-GB&client=mv-google&gl=US&v=zIom3LSbB0I
- Now go to http://www.savefrom.net and put link in text box, click on Download.
- After clicking on download button, another page will be loaded. In this page you will see video name and download options with available video formats. Click on 3GP or MP4 format.
- Download the converted video and enjoy.

Phones without Copy Paste feature
I know that there are so many people out there who don't have a mobile which supports copy paste feature. Let me modify the above method for you.
- Can you see this link below? http://m.youtube.com/watch?hl=en-GB&client=mv-google&gl=US&v=zIom3LSbB0I.
- Now you have to replace this m. with ss. Your above link will be like this.
- http://ssyoutube.com/watch?hl=en-GB&client=mv-google&gl=US&v=zIom3LSbB0I.
- Then open this link in your browser and the same download window will open.
Other Ways to Download
If you don't want to go through the above method then you can try tubidy.mobi. This is a very good site to download YouTube videos. You can download mp4, 3gp Hi, 3gp Low, mp3 and mp4 audio formats. You can also download video in parts.
Beware of Scammers
There is not any software for symbian mobile phone which can download YouTube videos. If you see any software like this don't download it. It can be a bookmark of any other mobile site, or maybe a virus. I have tested much software, barely there is any software which I forgot to use.
Before You Go
www.savefrom.net is a very unique website which supports almost all major website. You can download videos and files from these websites.
- rapidshare.com
- filefactory.com
- sendspace.com
- youtube.com
- google.com metacafe.com
- break.com
- dailymotion.com
- vimeo.com
- sevenload.com
- mail.ru
- smotri.com
- yandex.ru
- rambler.ru
- facebook.com
- livejournal.com
- myspace.com
- guitar-tube.com
- gametrailers.com
- own3d.tv
- twitch.tv
- zaycev.net
We all know that blogger.com has updated their website. The older was very good and Opera mini friendly, so many people like me used to blog via Mobile. But now the story is totally changed. New version has highly flash and java script enabled content. When we open it on Opera mini, it looks like a paper is crumbled and only 20% is view able. The only reason why i paused blogging is the updated version of blogspot. But people like me can still manage to post via mobile through several methods. I somehow managed to find some methods to post through mobile.

Let me share the different methods to post on blog by using your mobile phone.
1. Open blogger.com and log in to your account.
2. If you cannot view properly then open settings of Operamini by pressing #+8. Turn on single column view. (in opera mini 4.4 its called Mobile View).
3. Go to the folling link to post a new article. http://www.blogger.com/blog-this.g
4. Here you can post to your blog. Simply give title of your post, write article in textarea and publish.
The bad thing about Operamini 12 is that its RAM eater. It can suck you RAM when you open large web page. It may lead your phone to go hanged. If your smart phone RAM is less then 64MB then don't use it.
After knowing all the little bugs if you still wanna download Operamini 12 then click here.
1. Log in to you blogger acount from PC.
3. Select your blog which you want to set up to post via email.
2. Go to Settings > Mobile and Email you can set up a Mail-to-Blogger address which you will use to send posts via email to your blog. The format of the email address is username.secretword@blogger.com as show in screen shot.

Please keep this email secret or anyone will be able to post on your behalf. Also check the options shown here to publish posts immediately or draft them. Expample
The subjects of your emails will be the titles of your posts, and the body of the emails will be the text. All the image attachments will be published as post images. To avoid any expected bug in text please put #end tag at the end of your post.
READ MORE
Let me share the different methods to post on blog by using your mobile phone.
Operamini 7 and Operamini 4.4 Methods
Operamini is the most popular browser for mobiles. Let me share you simple tricks to use Operamini for blogging.1. Open blogger.com and log in to your account.
2. If you cannot view properly then open settings of Operamini by pressing #+8. Turn on single column view. (in opera mini 4.4 its called Mobile View).
3. Go to the folling link to post a new article. http://www.blogger.com/blog-this.g
4. Here you can post to your blog. Simply give title of your post, write article in textarea and publish.
The only problem with this method is that you cannot Label your post. But you should keep posting by this method and whenever you get access to a computer you can Lable all posts togather.
Operamini 12 s60v3
I really dont use this browser but the best thing about this browser is that it supports flash websites. You can view *.gif images and flash content in it. You may also be able to blog by it although i didn't test it yet.The bad thing about Operamini 12 is that its RAM eater. It can suck you RAM when you open large web page. It may lead your phone to go hanged. If your smart phone RAM is less then 64MB then don't use it.
After knowing all the little bugs if you still wanna download Operamini 12 then click here.
Blogging via Email
Google has already a feature which is called Mail-to-blogger. It can turn your smart phone into a blogging application. All you have to do is set it up.1. Log in to you blogger acount from PC.
3. Select your blog which you want to set up to post via email.
2. Go to Settings > Mobile and Email you can set up a Mail-to-Blogger address which you will use to send posts via email to your blog. The format of the email address is username.secretword@blogger.com as show in screen shot.
Please keep this email secret or anyone will be able to post on your behalf. Also check the options shown here to publish posts immediately or draft them. Expample
The subjects of your emails will be the titles of your posts, and the body of the emails will be the text. All the image attachments will be published as post images. To avoid any expected bug in text please put #end tag at the end of your post.
Blogger Applications (not for Symbian)
Google has launched its offical blogger Andriod application. I dont know why Nokia doesn't launch any blogger application. I am afraid everybody is soon gonna kick Symbian phones.Android Blogger Applications
1. Blogger
2. Blogger-droid
3. Bloggerroid
Before You Go
If you post images in your article by using any image host. Then these images may not be shown in Mobile view of Blogger thumbnails. To avoid this go to google image search and search images by using the following trick. Type this text in search bar.
site:blogspot.com Your keyword here
Replace the underlined text by your keyword. Now google will show only those images which are hosted on blogspot blog. You can use these images to avoid that thumbnail bug i mentioned above.
Telenor is providing the best and fast internet after Ufone. Although its not cheaper but some how we found a trick to share it with you. I have used Mobilink jazz internet, it wasn't that bad according to my location in punjab. I live in a town in near jehlum, so its not fast but its cheap. Ufone internet is awesome, i even enjoyed live streaming with it. But free is free, the lust of using free internet has its own taste. Haha

When i used Mobilink jazz internet, its speed was too slow. Sometimes i had to wait a hour to download a file bigger then 50 mb. When i used Telenor paid internet, it was too fast! But i cannot afford it, because its too expensive.
When we take a look at Ufone internet, its cheaper and fast. You can get 2GB in just Rs: 250. Its a good and affordable pakage, you can also enjoy live streaming.
Zong internet is awesome with normal speed. They give us 2GB in Rs: 200 and i have used it for so many months. Even i think they launched this pakage on my request. I called them once and requested them to launch 2GB pakage, and after few days it was launched. I swear its true. :D
I have no idea about Warid internet, but i heard that they provide quite good internet.
Price - PKR 10 (no additional charges)
Volume - 3 MB
Validity - 1 day
Usage Tracking - *999# @ PKR 0.15+tax
Price - PKR 35 (no additional charges)
Volume - 15 MB
Validity - 7 days
Usage Tracking - *999# @ PKR 0.15+tax
Price - PKR 105 (no additional charges)
Volume - 45 MB
Validity - 30 days
Usage Tracking - *999# @ PKR 0.15+tax
Price - PKR 12
Volume - 15 MB
Validity - 1 day
Price - PKR 250 (no additional charges)
Volume - 500 MB
Validity - 30 day
To get instant settings for your handset please send 'ALL' to 131.
For troubleshooting please call 345 Telenor helpline.
Data Bearer: Packet data
Access Point Name: mms
Username: leave blank
Password: leave blank
Homepage: http://sarakuj.com
Proxy: 80.239.242.253
Proxy Server: 80.239.242.253 (if you cannot put proxy server in settings, your net may not work)
Port: 80
IP: 80.239.242.253
DNS:
Primary DNS: 8.8.8.8
Secondary DNS: 8.8.4.4
Proxy Server: 80.239.242.253
Port: 80
READ MORE
Comparison
When i shared a method to get free Telenor internet for 30 days, i am sure you loved it. But you can not wait 30 days to get another pakage.When i used Mobilink jazz internet, its speed was too slow. Sometimes i had to wait a hour to download a file bigger then 50 mb. When i used Telenor paid internet, it was too fast! But i cannot afford it, because its too expensive.
When we take a look at Ufone internet, its cheaper and fast. You can get 2GB in just Rs: 250. Its a good and affordable pakage, you can also enjoy live streaming.
Zong internet is awesome with normal speed. They give us 2GB in Rs: 200 and i have used it for so many months. Even i think they launched this pakage on my request. I called them once and requested them to launch 2GB pakage, and after few days it was launched. I swear its true. :D
I have no idea about Warid internet, but i heard that they provide quite good internet.
Paid Pakages of Telenor
Telenor is so expensive and it provide little mb in big amount. Let me share you their paid pakages first.Daily
Activation - *345*901#Price - PKR 10 (no additional charges)
Volume - 3 MB
Validity - 1 day
Usage Tracking - *999# @ PKR 0.15+tax
Weekly
Activation - *345*902#Price - PKR 35 (no additional charges)
Volume - 15 MB
Validity - 7 days
Usage Tracking - *999# @ PKR 0.15+tax
Monthly
Activation - *345*903#Price - PKR 105 (no additional charges)
Volume - 45 MB
Validity - 30 days
Usage Tracking - *999# @ PKR 0.15+tax
Daily II
Activation - *345*905#Price - PKR 12
Volume - 15 MB
Validity - 1 day
Mega Monthly Bundle
Activation - *345*904#Price - PKR 250 (no additional charges)
Volume - 500 MB
Validity - 30 day
Please Note
Activations after 10 pm will have an additional day of validity.To get instant settings for your handset please send 'ALL' to 131.
For troubleshooting please call 345 Telenor helpline.
Free Internet Settings
Connection Name: SaraKujData Bearer: Packet data
Access Point Name: mms
Username: leave blank
Password: leave blank
Homepage: http://sarakuj.com
Proxy: 80.239.242.253
Proxy Server: 80.239.242.253 (if you cannot put proxy server in settings, your net may not work)
Port: 80
Advanced Settings
Network Type: IPV4IP: 80.239.242.253
DNS:
Primary DNS: 8.8.8.8
Secondary DNS: 8.8.4.4
Proxy Server: 80.239.242.253
Port: 80
Before You Go
Please note that free internet works only on Opera 7.3 or Opera 4.4. If you cannot edit or create settings in your phone then please don't try this. This is working method, and i am even posting this trick to blogger via Telenor free internet. It may not work on other applications exept Opera mini. Go ahead, give it a try
I always prefer gmail, because its faster and reliable. Some untrusted websites offer you something and ask you for your e-mail, then they start to send spam e-mails to you. If you are tired of removing emails from spam folder then please don't worry and apply this method.

Now all emails in spam folder will be deleted automatically. You can create more filters and label/categorize them as Office, Home etc
READ MORE

- Sign in to Gmail.com
- Open the settings by clicking the settings icon at the top right side. (new version)
- Click on Filters tab and then click on create new Filter
- A form will appear to create a new Filter. Leave everything blank, just write in:spam in the Has the word part. Click on Create filter with this search.
- In next part, click on the checkbox
Delete it
Also click on the other checkbox if you want to delete already e-mails in spam folder
Also apply the filter to 4000 matching conversations.
And click on Create Filter


Now all emails in spam folder will be deleted automatically. You can create more filters and label/categorize them as Office, Home etc
Yes you heared me right, now you can easily edit splash screen of Opera Mini Symbian. Its easy to mod opera mini java, but hard to mod symbian Opera mini. All you have to do is Download the Python Software and install it. IT can be done in few easily steps. You don't have to go to the Hex Editor and do all that stuff now, because i know that is not easy for everyone.
Follow my steps
You can edit Opera Mini skin with this Application, if you face any problem then comment here. Enjoy :)
Open your latest Opera Mini with SisEditor and goto File List. Press left side button and select add. It will ask you to add any new file. Add the splash in it, press center key on splash. It will open splash path, give the following path to splash.
!:\system\apps\OperaMini\splash.dat
Then pack your Opera Mini and install to see the magic.
READ MORE
Follow my steps
- Install this application
- Launch this application and press right key to open options, select Splash Maker.
- Select the location of the image to use as Opera Mini Splash
- Then it will ask you these options, select your desired one.
- Now it will process your image and it will create a splash in 3 sec. It will ask you for save location. select location i used E:/
- Now it will save a file named as splash.dat. Move this file to the
E:/system/apps/Opera/
use C if you have installed Opera Mini in C drive.


You can edit Opera Mini skin with this Application, if you face any problem then comment here. Enjoy :)
Packing Opera Mini Splash
If you want to pack this splash in Opera Mini then use SisEditor to pack it.Open your latest Opera Mini with SisEditor and goto File List. Press left side button and select add. It will ask you to add any new file. Add the splash in it, press center key on splash. It will open splash path, give the following path to splash.
!:\system\apps\OperaMini\splash.dat
Then pack your Opera Mini and install to see the magic.
Before You Go
After packing the Opera Mini, it will be unsigned. You have to sign it if your phone is not hacked.
I saw so many Users complaining about Free iSMS registration problem. I myself was so upset about it, one day my brother told me that he is using iSMS and he didn't face Registration problem. So i suddenly thought why its happening to me only? I googled about it and saw so many people, i felt that i am not alone :). So i decided to do something by my own. I tried only one method and it worked.

Let me tell you what i did. I simply took my brother's mobile from him and copied two files from his mobile.
C: / Data / FreeiSMS / FreeiSMS_0xXXXXXXXX.dat
C: / Data / FreeiSMS / FreeiSMS_0xXXXXXXXX.db
XXXXXXXX can be different in different version of iSMS.

Then i sent both files to my mobile and i pasted both files in
C: / Data / FreeiSMS /
Then i opened Free iSMS > Options > Login

Then i tried to Register it with my mobile number or e-mail and i succeeded. Now i am so happy that i am still using it and i am loving it <3. Here is the proof, i mean preview of my iSMS.

If you are using internet on your friend's pc or on internet cafe, then you can use opera to browse private. In this case, nothing will be saved including history, cache, passwords etc
Lets start the trick, right click any where on the empty side of opera browser as shown in image. Then click on Private Tab...

Now a tab will be opened as shown below, now start private browsing without any fear.

I have great interest in Symbian devices, infact i badly love them. You can change your S60v3 device to a PC by instally variety of Softwares. My phone can do everything which i usually try on a PC. Its just because f my Symbian phone.

Memory Problem
- People are often worried about the mobile memory of Phone, because it gradually decreases if you install so many applications (even in memory card).
- If you got same problem then you can try my following methods to get your little MB back. :)
- Open Rom Patcher and enable Open4all patch then open any file manager and go to
C:/ Private / 1020724
you will find a file named "reserved". Simply delete it and get few phone memory back. (path maybe changed in some phones, you can check all folders here) - Then go to C:/ System and open that folders, you will see so many file/folders here. All you have to do is delete folders/files of those applications which are already uninstalled from your device. (be careful, don't remove any system file)
Java Backup
- When we downlnad any Java file in .jad extension. The file will install directly without any backup. I am going to tell you how to find backup file.
- Simply go to C:/ Private / MIDlets and you will find the installed file folder here. Copy the .jar file in it. Yupee we got backup file. :)
Unable to Send protected item
- If you see this error message then simply renamed that file and remove extension, after sending change the extension again.
- For example: change spiderman.jar to spidermanjar and send it.
More Simple Tips and Tricks
All Tips / Tutorials / Tricks / Mods / for S60 Cellphones here -updatedTip 1 : Do u know how to use the edit button (abc or pencil button)? Heres how... In the inbox for example; u wanna delete multiple sms, simply hold the edit button,scroll down, and then, press c to delete the marked sms. The edit button can also b used to copy and past text in sms, simply hold it and scroll across, choose copy. Pretty good for placing song names in ngages.
Tip 2 : Shit happens, on a smartphone, its inevitable u do something wrong, and tis calls for a format of fone. To format the fone, press *#7370#, then enter the lock code, which is the sec code of the fone. NOTE: batt must b full, else if format is disrupted by low batt, consequences will b disatrous.
I heard the code *#7780# works too, pretty much the same i tink. for 6600 users, to format the fone, theres an alternative way. Press and hold <3>, <*> and Call (Send) buttons, then power on fone, keep holding on the 3 buttons, till u come to a format screen. This method ONLY works on 6600, and need not enter the sec code. BUT sec code would be reset to default 12345.
Tip 3 : TO NGAGE USERS; Did u know u can install .sis files simply using the cable given? Juz plug it in, place the .sis file anywhere on e: (the mmc), not in any folders, root of e:, disconnect, then look for it in manager.
Tip 4: Save on battery and system memory being used by regulary checking the task manager which can be accessed by holding down the menu button!!
Tip 5: Type *#06# to display your IMEI serial number, very valuable for the unlocking your phone to other sim card Tip 6: Type *#0000# to view which firmware version you are running
Tip 4a: Set the screen saver to a short time out period to prolong battery life.
Tip 4b: Avoid restarting the phone, or repeatedly turning it on and off. This helps increase battery life.
Tip 7: If you would like to avoid being "blue jacked", keep bluetooth turned off, or set your phone's visibility to hidden.
Tip 8: Don't want to carry a watch and a phone? Set the screen saver to show date and time, then you can ditch the watch.
Tip 9: Save memory when installing apps, by installing over bluetooth. This can be done using the nokia phone suite and a bluetooth serial connection.
Only works with .SIS files, so java still has to be sent to the phone, but will save space when using .SIS files.
Tip 10: Operator logos Use a filemanager like FExplorer or SeleQ to add the folders: "c:/system/Apps/phone/oplogo". Add a .bmp picture to folder "oplogo" and restart your phone! The .bmp picture size needs to be: 97 x 25 pixels
Tip 11: Check if the recepients phone is on Delivery reports or Type *0# your message in the message composer window space then write your message, the recipient will not see the star zero hash bit - just the message When they read it it will relay a message back to your fone showing the time they recieved it. (haven't yet tried it myself though)
Tip 12: BlueJacking First up, you need to know what Bluetooth is. There are lots of types of modern devices that incorporate Bluetooth as one of their many features. PDAs, mobile phones and laptops are a few of these modern devices.
Bluetooth means that Bluetooth enabled devices can send things like phonebook/address book contacts, pictures & notes to other Bluetooth enabled devices wirelessly over a range of about 10 metres. So, we've got past the boring part. Now, using a phone with Bluetooth, you can create a phonebook contact and write a message, eg. 'Hello, you've been bluejacked', in the 'Name' field. Then you can search for other phones with Bluetooth and send that phonebook contact to them.
On their phone, a message will popup saying "'Hello, you've been bluejacked' has just been received by Bluetooth" or something along those lines. For most 'victims' they will have no idea as to how the message appeared on their phone
#13: While you are viewing a picture in your phone's gallery, press one of these shortcut keys (definitely works on 6600, not sure about other symbians)
1 - turn image anticlockwise 3 - turn image clockwise * - toggle on/off of full screen 5 - zoom in 0 - zoom out #15 u can select all files in a folder by selecting THE folder and copy it then paste it somewhere. However u need to make a new directory.
Fexplorer wun let u copy that folder together. Well seleQ can mark files to copy but it really takes time! #16: A soft and Hard reset A Soft-reset - the process of resetting all the settings of the phone to the factory default! No applications are deleted!
A Hard-reset is like formatting a drive! It does format the memory. Everything that has been installed after the first use of the phone is deleted! It will recover the memory of the phone to the state you purchased it! It is done by inputing the following code: *#7370#
NOTE: The battery must be full or the charger has to be connected to the phone so that it does not run out of power and make the phone unusable.
#17: Formats of images supported ones: JPG UPF GIF87a/89a WBMB MBM TIFF/F PNG EXIF How to copy & paste text in your Nokia 3650:
Press and hold the pencil key and select your text using the scroll key. Left function key will change to 'Copy'. Press it to copy the selected text to clipboard. You can paste the clipboard contents the same way: press and hold the pencil key and press 'Paste'. Or, press pencil key once and select 'Paste'. Press and hold the Menu key to open the application switching window, where you can *duh* switch between applications.
If a program hangs and you can't shut it down, select the application in the application switching window and press 'C' to kill it. It's also a faster way to exit programs.
Turn on/off the "click" sound made by the camera by selecting the 'Silent' profile or by turning warning tones on/off:
Menu > Profiles > "select your activated profile" > Personalise > Warning tones > On/Off. (This also effects the sound of Java games and apps).
To change background image go to:
Menu > Tools > Settings > Phone > Standby mode > Background image > Yes > "choose an image". The best size for background images is 174x132 pixels. Only got blue, green and purple in your 3650 colour palette?
This free app adds 3 more colours: Palette Extender. Display an image when someone's calling: Menu > Contacts > "select a contact card" > Options > Edit > Options > Add thumbnail > "choose an image".
Add a personal ringing tone to a contact: Menu > Contacts > "select a contact card" > Options > Open > Options > Ringing tone > "choose a ringing tone".
Delete all messages from your Inbox at once:
Menu > Messaging > Inbox > Options > Mark/Unmark > Mark all > Options > Delete. Send or hide your caller ID:
Go to: Menu > Tools > Settings > Call > Send My Caller ID > 'Yes', 'No' or 'Set By Network' to follow the default settings of your home network. If you often copy large files to your MultiMedia Card, I recommend a card reader. E.g. With a card reader it takes only 12 seconds to copy a 10 MB file!
Record the sound of a phone call using the (sound) Recorder. Menu > Extra's > Recorder > Options > Record sound clip. Note: short beeps are audible during call registration. But there is a 60 second limitation so if you want unlimited sound recording get this app: Extended Recorder.
While writing text, press "#" to switch between upper and lower case and Dictonary on/off (predictive text input). Press and hold "#" to switch between Alpha mode and Number mode. Keyboard shortcuts for zooming and rotating images in Images: 1 = zoom in, 0 = zoom out, press and hold to return to the normal view. 2 = rotate anticlockwise, 9 = rotate clockwise, * = full screen. In standby mode, press and hold the right soft key to activate voice dialling.
To add a voice tag to a phone number, open a contact card and scroll to the phone number and select: Options > Add voice tag.
You can customize both soft keys located below the screen (in standby mode): Menu > Tools > Settings > Phone > Standby mode > Left/Right selection key > "select an application".
In standby mode. Press scroll key center (joystick) to go directly to Contacts. In standby mode, press and hold 0 to launch your wap home page.
In Menu or any subfolder, press numbers 1 - 9 to start the application at that location. 123 456 789 In standby mode, 45# + dials the number on your sim in memory slot 45. 50# + dials slot 50 and so on. If you have your keylock activated just press the on/off button to turn on your backlight to look at the time when it's dark without having to unlock the keypad. Never, ever, in your whole life, install WildSkinz on your Nokia 3650!!! WildSkinz screws up the whole 3650 system.
To check your current firmware version simply type *#0000# on main Phone screen. · How to check your IMEI (International Mobile Equipment Identity)? Type *#06# on main Phone screen. Start up in Safe Mode so no 'auto start' apps will be running: To make sure that no memory-resident programs start when you reboot your phone, hold down the pencil key when you turn on the phone and hold it on untill you have to enter your PIN code.
(When you have trouble booting up the phone with the MMC in it because it got corrupted for some reason, this trick will almost always let you boot up the phone so you can remove the latest installed app which might have caused the problem or if your phone is "unrepairable" you can still back up your important data before you do a format.)
Q: How to totally format your Nokia 3650 and remove all installed applications, user files and restore all settings to default like it's new out of the box? (OEM apps won't be deleted like Camera and RealOne Player).
A: First Format your MMC: Menu > Extras > Memory > Options > Format mem. Card > Yes. Note: It is very important to format your MMC before you format your phone! Then format your phone by typing *#7370# on main Phone screen. Phone will ask: "Restore all original phone settings? Phone will restart." Press 'Yes' and enter your Lock code (default is 12345).
Tip: Formatting takes several minutes so you'd better connect your Nokia 3650 to a charger to ensure that your battery doesn't get empty in the middle of formatting. Note: All your created acces points and mailboxes will be lost so take a note of them. And all application settings will be reset.
E.g. In Camera, image quality is set back to normal and memory in use is set back to phone memory. And also in Messages, memory in use is set back to phone memory, etc. Also backup your contacts with PC Suite or a program like Contacts Manager. To reset your wallet, should you forget your code, Type in: *#7370925538# this will reset the wallet code, the wallet contents will be deleted.
How to free more RAM on your phone
>>> Method 1: Flight mode: Put your phone in "Flight mode" with Psiloc System Tools. Install System Tools, open it and select "Flight mode". This way you can restart the phone without your SIM card so there will be no running phone tasks in the background.Now you can have up to 3,5 MB of free RAM! Note: ironically enough, Flight mode doesn't work when Smart Launcher is installed, at least in my case. But i've also heard several reports of people who have both apps running without any problems.
>>> Method 2: Smart Launcher trick: Install Smart Launcher and open it. Go to Options, Settings and put Launcher ON. Now plug in your charger and switch off your phone.
Wait untill the battery meter appears and short press the Menu button (don't hold). The menu should appear and now you can have 3,5 to 4,5 MB free RAM! (Hold Menu button to check RAM).
The trick is that with the charger plugged in, the phone must get a minimum software support for charging, even when the phone is switched off. And somehow Smart Launcher has still got it's shortcut running and that's the Menu button.
So when you press the Menu button, you go directly to the Menu without any other phone tasks running in the background so you trick the phone and you have more free RAM! Note: when you unplug the charger, the phone will switch off.
>>> Method 3: Menu : This method I found it by myself, it frees a little about 100~200 KB but I guess it's useful sometime Close your menu not by selecting the right selection key "exit", or pressing the menu key another time, they only hide the menu app but do not close it, to close it select the left selection key "option" and scroll down and select "exit"
So when you open an app need smore ram reopen menu and close it, it's useful when play low bit rate video in realplayer paradis.
This is how to check MMC (memory card) unlock cord or password. For who lost or dont remember with the password after locked and almost crazy with it.
Mmc pasword remove
Firstly: You need to hack your phone. Because some model of phone can’t see the hidden directory (folder). After hack you can organize the hiddden or protect file. (Check how to hack symbian phone)Open with X-Plore file browser Go to “C:\” (phone memory) than find “sys” folder, find next “data” folder, search the file name “mmcstore” and you MMC password located at here.
XMPL= C:\sys\data\mmcstore\ After that copy the “mmcstore” file to other directory on “E:\” and rename them to “mmcstore.txt”.
Now open this file with “DEDit app” or you can press botton (8) ifyou use X-Plore app. You will show what the password you put.
HIDE UR PERSONAL DATA..IMAGES,,,ETC BY USING X-PLORE
U CAN HIDE UR PERSONAL DATA..IMAGES,,,ETC BY USING X-PLORE JUST FOLLOW THE STEPS--1-SEARCH FOR "_PAIbTN" FOLDER IN YOUR X-PLORE.
2-THAN MOVE UR DATA TO THIS FOLDER...
3-THIS FOLDER U WILL FIND IN IMAGES FOLDER...
IN this WAY U CAN HIDE YOUR DATA,,,& EVEN YOUR PICS FROM GALLERY VIWER ....
TRICK to RECORD from VISUAL RADIO 100% WORKING!!!!
You must do the steps I write:1. Install Ultimate Voice Recorder
2. Run Visual Radio via loudspeaker and set the biggest volume for best result
3. Run Ultimate Voice Recorder, for best result choose the wav format
4. Press record and set the biggest volume
5. Now you'll find it very easy to record audio from Visual Radio Basically
Ultimate Voice Recorder is great recording application which can record every sound, not only sound from Visual Radio or internet radio but every single sound that your phone emanates and sound comes around your phone.
That's why, before recording make sure your surrounding is quite. I don't know with another recorder, maybe they can record from radio too. I also attach a recorded files from Visual Radio in wav format as a sample. Have a try! Hope that this will help people a lot.
Watch TV with RealPlayer on Os 9.1/9.2
Most people know that you can watch live TV with Vimio Live TV but only with 5 channels. but here I would like to introduce a method without any app to be installed jus with the help of real playerPLEASE NOTE:
YOU WILL NEED A UNLIMITED GPRS PLAN TO DO THIS.
Guide:
Go To Menu -> Application Software -> Realplayer -> Options -> Settings -> Open the link -> Open Network -> The default access point will be set to wap over GPRS or WIFI or anyother Options -> Advanced Change EGPRS to 80.00 kbps bandwidth Then return Open Gallery -> streaming links Finally in streaming links open new link and save the address given below whch ever you want.
Channels
Shanghai Sportsrtsp://211.136.165.58/sports_m.sdp
CCTV News Channel
rtsp://211.136.165.58/cctvnews_m.dsp
Orient Satellite TV
rtsp://211.136.165.58/yule_m.sdp
Oriental music rtsp://211.136.165.58/gunbo05_v_m.sdp
Radio rtsp://211.136.165.58/radio_101_m.sdp
CCTV-1 Integrated / news rtsp://218.28.0.14:554/encoder/cctv1
CCTV-2 economic / life / service
http://www.era-cn.com/tv/tv/hyds/wm/cctv2_400.asx
CCTV-3 Entertainment
rtsp://61.156.17.196/encoder/tv1
CCTV-4 The international channel
mms://4.19.71.20/cctv4b
CCTV-5 sports
http://www.era-cn.com/tv/tv/hyds/wm/cctv5_510f.asx
CCTV-7 children / military / agriculture
http://www.era-cn.com/tv/tv/hyds/wm/cctv7_400.asx
CCTV-8 Television
http://www.era-cn.com/tv/tv/hyds/cctv8_450.ram
CCTV-9 news
http://www.era-cn.com/tv/tv/hyds/wm/cctv9_400.asx
CCTV-10 science / education
http://www.era-cn.com/tv/tv/hyds/wm/cctv10_400.asx
Looks like Facebook is feeling insecure from Twitter. First they introduced mention same as Twitter function and now Timeline, well i don't like Timeline.
Its difficult to mention by using mobile phone. You can mention by using phone if you know the id of the page, person or group. To find out the id of page/group/profile you have to do this simple step.

Finding ID
Group
https://facebook.com/groups/352449594787137underlined text is group id
Profile
Open any photo from profile and underlined id will be the id of the profilehttps://graph.facebook.com/USERNAME
change USERNAME to your Username
Page ID
To find any facebook page id, copy page link and open it by putting graph instead of wwwfor exapmle
this is page link
https://www.facebook.com/imalon3
open it by changing it as below
https://graph.facebook.com/imalon3
you will page Id there :)

Mention
To mention from a pc, put @ symbol and start typing name of friend to mention.In mobile, use this to mention any friend.
@[ID:]
change ID to the desired ID, for example @[0945434543427546:] then press share. :)
Get Facebook ID instantly
Type Username or Page Username to get ID
This tutorial is based on modification of Operamini with s40 phone.

APPLICATIONs NEEDED:
- Class Editor
- Class translator
- BlueFTP
- Raw Operamini 4.2
- Picture in .png format
- Phone that support add & edit data..
BlueFTP and extract all it content
into a folder.
Change the www. Of the add bar
open ur class translator locate thefolder where d extracted files are open code.class (4 handler), Z.class (4 LabsHandler) scroll down you will see www. click on it & change
it. eg: .. Infotokra press option save it, press option again choose close it will show 'leave spare file' press option 'No' ok then exit... Thats it...
Changing Operamini Name:
Open your class editor locate theextracted files open META- INF
inside it. You will see manifest.mf inside it you will see Midlet-name, change it to any name u want.
Note: we dont change d name of operamini4.2labsHandler else you will get error.
Change Operamini Icon
In the extracted files you will see i.png. Delete it theen copy d picture that you want 2 use with blueFTP and paste it in the folder where theextracted files are, theen rename that picture to i.png
Changin Connecting, installing, processing, loading, connecting
Open your class editor locate V in the extracted files, open it press 9 in the text box enter Connecting thenpress 2 once to see it. Use key 4 to
scroll to the first letter of the word C
press *. You will see red bar behind dat C, use key 6 to highlight the word and stop at the last letter of the word G press 5, 3 times choose text and enter the new word you want to use in replace (the word must not exceed 10 characters if the new word is not up to 10 you can add space to make it 10 character). Press upper left key and save it.
Use the above procedure to edit
INSTALLING, PROCESSING, LOADING too. There are two loading in V so edit the both.
Note: Installing, Connecting &
Processing are 10 letters. Loading is 7 letters.
Change Welcome Page
(the page that it will show when installing your opera before accept)
Open ur class editor locate theextracted files. Open v, scroll down with key 8. You will see http://www.operamini.com/firsttime/4.2/ scroll to that first w. Then press 6 to highlight the link and stop at the (/) after 4.2 eg: | www.operamini.com/
firsttime/4.2/ | press 5, 3 times
choose text then enter the new link
that you want to use (that link is 32
characters and the new link must also be 32 characters but if the link is not up to 32 characters add spaces at the back of the link 2 make it 32) eg: www.example.com/ if the url is not up to 32 complete it with space then Press upper left key and save it.
Packing of Opera
Now to pack your opera, open your blueFTP locate the folder where theextracted files are. Open it then press menu select all it will highlight all press menu again 'choose compress to zip' give it anyname.zip eg: mini.zip ok continue pressing yes until you see finally compress, now rename your opera from .zip to _jar eg: mini.zip to mini_ jar. Then exit blueFTP. Goto ur gallery loate the opera then rename it 4rm _jar to .jar eg: mini_jar to mini.jar
APPLICATIONs NEEDED:
- Class Editor
- Class translator
- BlueFTP
- Raw Operamini 4.2
- Picture in .png format
- Phone that support add & edit data..
BlueFTP and extract all it content
into a folder.
Change the www. Of the add bar
open ur class translator locate thefolder where d extracted files are open code.class (4 handler), Z.class (4 LabsHandler) scroll down you will see www. click on it & change
it. eg: .. Infotokra press option save it, press option again choose close it will show 'leave spare file' press option 'No' ok then exit... Thats it...
Changing Operamini Name:
Open your class editor locate theextracted files open META- INF
inside it. You will see manifest.mf inside it you will see Midlet-name, change it to any name u want.
Note: we dont change d name of operamini4.2labsHandler else you will get error.
Change Operamini Icon
In the extracted files you will see i.png. Delete it theen copy d picture that you want 2 use with blueFTP and paste it in the folder where theextracted files are, theen rename that picture to i.png
Changin Connecting, installing, processing, loading, connecting
Open your class editor locate V in the extracted files, open it press 9 in the text box enter Connecting thenpress 2 once to see it. Use key 4 to
scroll to the first letter of the word C
press *. You will see red bar behind dat C, use key 6 to highlight the word and stop at the last letter of the word G press 5, 3 times choose text and enter the new word you want to use in replace (the word must not exceed 10 characters if the new word is not up to 10 you can add space to make it 10 character). Press upper left key and save it.
Use the above procedure to edit
INSTALLING, PROCESSING, LOADING too. There are two loading in V so edit the both.
Note: Installing, Connecting &
Processing are 10 letters. Loading is 7 letters.
Change Welcome Page
(the page that it will show when installing your opera before accept)
Open ur class editor locate theextracted files. Open v, scroll down with key 8. You will see http://www.operamini.com/firsttime/4.2/ scroll to that first w. Then press 6 to highlight the link and stop at the (/) after 4.2 eg: | www.operamini.com/
firsttime/4.2/ | press 5, 3 times
choose text then enter the new link
that you want to use (that link is 32
characters and the new link must also be 32 characters but if the link is not up to 32 characters add spaces at the back of the link 2 make it 32) eg: www.example.com/ if the url is not up to 32 complete it with space then Press upper left key and save it.
Packing of Opera
Now to pack your opera, open your blueFTP locate the folder where theextracted files are. Open it then press menu select all it will highlight all press menu again 'choose compress to zip' give it anyname.zip eg: mini.zip ok continue pressing yes until you see finally compress, now rename your opera from .zip to _jar eg: mini.zip to mini_ jar. Then exit blueFTP. Goto ur gallery loate the opera then rename it 4rm _jar to .jar eg: mini_jar to mini.jar
If you are tired of the old standby icon bar then this is for you. So lets start it. We can use our desired standby icon settings by a application called SmartWork. (download link at the end)
Its unsigned application, so you need to sign it or hack your phone. Click here to hack your phone.

SettingUp minibar
Lets proceed to configure minibar settings.Remember the drive where its installed. Suppose its C then goto
C: / Data / MPC / SmartWorkspace / Settings.ini
Open File Settings.ini with any third-party text editor.
You will see these settings in it.
[MB Applications]
1. We have to find UIDs of applications which we have to put in mini bar for example 0x12345678UIDs can be seen by a variety of softwares. Download UninstallKing s60v3.sis then you can find application UID in application details.
[WorkIn]
2. Leave it as default[MBSettings]
3. Its keykod of keypad key "C". Which shows that you can activate or deactivate mini bar by pressing "C" key.Set Position of mini bar:
PortraitPosition (Position minibar in portrait mode)LandscapePosition (Position minibar in landscape mode)
With 5 possible values.
1) OnCBA - horizontal bar on the function key (the bottom).
2) AboveCBA - horizontal bar above the buttons functions.
3) RightVertical - a vertical bar on the right (as in 9.3, only the right).
4) LeftVertical - the vertical bar on the left (as in 9.3).
Autostart
It defines Autostart of this application every time you restart your phone.If we indicate Enable, then activated.
If Disable then deactivated.
Dynamic Switch
If we indicate Enable, then activated.If Disable then deactivated.
Save File
Simply save Settings.ini file and reboot this application and enjoy.Download SmartWork v0.50 s60v3
There are times when you have used your symbian phones to an extent where some incompatible applications or viral infections begin affecting the performance of your mobile. All you need do in this type of situation is to Hard reset your phone to optimise its speed and performance. There are two aspects or types of reset i would touch in this post.
* + 3 + Send Button (Green key) + Power button.
Note that in s60v2 (though not all), the word formatting can be displayed while s60v3 don't display them. Make sure that your phone asks you to reset time, date and other stuff. If you didn't recieve such a prompt, it means you didn't hold the buttons properly, so you have to redo it to achieve your Hard Reset. Drop your comments please.
its same as above method, i just modified it little bit.
* + 3 + Send Button (multimedia key) + Power button.

Soft Reset:
To soft reset your symbian phone, you need to know the security code of the phone. After you boot your phone, you then type in *#7370#, your security code would be asked of you by the phone, type it in and press OK. The phone would restart and all those problems would be solved on your phone. If they persist then try the HARD RESET below.Hard Reset:
In this case, all you need do is switch off your phone and then hold this four keys at the same time, starting like this* + 3 + Send Button (Green key) + Power button.
Note that in s60v2 (though not all), the word formatting can be displayed while s60v3 don't display them. Make sure that your phone asks you to reset time, date and other stuff. If you didn't recieve such a prompt, it means you didn't hold the buttons properly, so you have to redo it to achieve your Hard Reset. Drop your comments please.
Other Method
Few days back i tried to reset my Nokia N78 but i failed, the above method did't work on my Nokia N78, but it worked on N73. So i found a new way to reset my N78.its same as above method, i just modified it little bit.
* + 3 + Send Button (multimedia key) + Power button.

This tutorial will guide you
through the process of
formating any type of
removable disk e.g. a flash drive,
mp3 player etc.

Step 1
Plug in the removable disk you
want to format.
Step 2
Goto my computer and take
note of the drive of the
removable disk e. g. drive E: , C;
Step 3
Click on the start button and
press R on your keyboard.
Step 4
Type in cmd (this should open
the command prompt window)
Step 5
In the command prompt
window type in format (space)
the drive e.g. "format e: /q"
Press enter again on the
keyboard.
After the formatting process is
complete, type in the label you
want to assign to your
formatted removable disk and
press enter. Finally, type in exit
and press enter. Thats all!
Thanks for reading.
through the process of
formating any type of
removable disk e.g. a flash drive,
mp3 player etc.

Step 1
Plug in the removable disk you
want to format.
Step 2
Goto my computer and take
note of the drive of the
removable disk e. g. drive E: , C;
Step 3
Click on the start button and
press R on your keyboard.
Step 4
Type in cmd (this should open
the command prompt window)
Step 5
In the command prompt
window type in format (space)
the drive e.g. "format e: /q"
Press enter again on the
keyboard.
After the formatting process is
complete, type in the label you
want to assign to your
formatted removable disk and
press enter. Finally, type in exit
and press enter. Thats all!
Thanks for reading.
If you see your most favourite game/application of any website and try to download it but the games doesn't match with your mobile screen size and suddenly you say, "what the hell?". Don't worry, i got a solution for you.

Now you can change java application screen size from your phone! For this, you must have two java applications called
Blueftp
Class Editor.
Launch this application and open targeted application which you want to change. Then Extract all the files by pressing options & select all => Extract all, extract them to an empty folder. Now Open your Class Editor then locate the folder you extracted that application into, then open META.INF=> then MANIFEST.MF
Open it, you would see the application name, version, description and so on! Just go to the last line and Press 5 go to Text and input this
 Then close Class Editor and Repack all files with Blueftp and run application! Your application is changed the way you wanted it. :)
please backup the original file, we don't accept any damage.

Now you can change java application screen size from your phone! For this, you must have two java applications called
Blueftp
Class Editor.
Launch this application and open targeted application which you want to change. Then Extract all the files by pressing options & select all => Extract all, extract them to an empty folder. Now Open your Class Editor then locate the folder you extracted that application into, then open META.INF=> then MANIFEST.MF
Open it, you would see the application name, version, description and so on! Just go to the last line and Press 5 go to Text and input this
please backup the original file, we don't accept any damage.
C2Z patch is a really useful patch for s60v3 mobile phones, by using this patch you can do some amazing changes in your phone. For example you can add more effects in your mobile, you can change the info showed in your Nokia's about me page, and many more. :)
You need to hack your phone first, Read Here.

so lets start the tutorial. All you need is a C2Z Patch Generator. Download it and install it.


 Then obviously open it :)
Then click on Left Side Button then close your eyes and click first option. I said close your eyes because it's in any other language, and the meaning of first option is Generate C2Z Patch.

Then open memory card and required patch will be in your memory card. Move this patch to the directory E:\patches

Then open Rom Patcher and use you c2z.rmp patch as you want. :)
You need to hack your phone first, Read Here.
so lets start the tutorial. All you need is a C2Z Patch Generator. Download it and install it.
Then click on Left Side Button then close your eyes and click first option. I said close your eyes because it's in any other language, and the meaning of first option is Generate C2Z Patch.
Then open memory card and required patch will be in your memory card. Move this patch to the directory E:\patches
Then open Rom Patcher and use you c2z.rmp patch as you want. :)
I personally don't like the shaking hand boot screen of Nokia phones. Its getting old, people don't like it.
So many people try to google it about changing boot screen of Nokia phone, but mostly sites tell the c2z patch method, which is quite big and complicated method.
If you want to change boot screen of your Nokia S60v3 phone, then i got a surprise for you.
Ok let me tell you how i did this.
Windows Boot Screen
Its tested and working 101% on S60v3 O.S. 9.X.
Goto C: then boot
 You will find a image named startup.gif, replace it with your desired image. Then restart your phone.
You can use gif animation images.
I don't accept any damage, but i am using my own image as boot screen on my N79 since 9 months. This is uncertified application, you need to hack your s60v3 mobile before you try it.
So many people try to google it about changing boot screen of Nokia phone, but mostly sites tell the c2z patch method, which is quite big and complicated method.
If you want to change boot screen of your Nokia S60v3 phone, then i got a surprise for you.
Ok let me tell you how i did this.
What is Awesome?
I know that so many people don't like the default boot screen of Nokia mobiles, using this application you can change the default startup screen to a very cool Windows XP boot screen, isn't it awesome?Windows Boot Screen S60v3
To change the default boot screen aka startup screen. All you have to do is download and install the software below.Windows Boot Screen
Its tested and working 101% on S60v3 O.S. 9.X.
Change Boot Screen, Anytime
If you don't like the Boot Screen which is included in this Software, then simply follow my stepsGoto C: then boot

Roll Back TO Normal
If you want everything back to original, then Simply remove this software from application manager. if still you are unable to remove it, then you can delete the whole folder from C: drive. Its easy to delete the folder instead of removing the application.Before You Go
Your boot screen must be same as your screen size, e.g. 240x320.You can use gif animation images.
I don't accept any damage, but i am using my own image as boot screen on my N79 since 9 months. This is uncertified application, you need to hack your s60v3 mobile before you try it.
O.S. 9.X Mobiles
S60v3 SymbianOS 9.1
Nokia 3250 Nokia 5500 Sport Nokia E50 Nokia E60 Nokia E61 Nokia E61i Nokia E62 Nokia E65 Nokia E70 Nokia N71 Nokia N73 Nokia N75 Nokia N77 Nokia N80 Nokia N91 Nokia N91 8GB Nokia N92 Nokia N93 Nokia N93i Samsung SGH-i570S60v3 FP1(v3.1) SymbianOS 9.2
LG KS10 LG KT610 LG KT615 Nokia 5700 XpressMusic Nokia 6110 Navigator Nokia 6120 classic Nokia 6121 classic Nokia 6124 classic Nokia 6290 Nokia E51 Nokia E63 Nokia E66 Nokia E71 Nokia E90 Communicator Nokia N76 Nokia N81 Nokia N81 8GB Nokia N82 Nokia N95 Nokia N95 8GB Samsung SGH-G810 Samsung SGH-i400 Samsung SGH-i408 Samsung SGH-i450 Samsung SGH-i458 Samsung SGH-i520 Samsung SGH-i550 Samsung SGH-i550w Samsung SGH-i560 Samsung SGH-i568S60v3 FP2(v3.2) SymbianOS 9.3
Nokia 5320 XpressMusic Nokia 5630 XpressMusic Nokia 5730 XpressMusic Nokia 6210 Navigator Nokia 6220 classic Nokia 6650 fold Nokia 6710 Navigator Nokia 6720 classic Nokia 6730 classic Nokia 6760 slide Nokia 6790 Surge Nokia E52 Nokia E55 Nokia E71x Nokia E72 Nokia E75 Nokia N78 Nokia N79 Nokia N85 Nokia N86 8MP Nokia N96 Nokia X5 Samsung GT-I7110 Samsung SGH-L870 Samsung GT-i8510 (INNOV8)
C2Z patch is a really useful patch for s60v3 mobile phones, by using this patch you can do some amazing changes in your phone. For example you can add more effects in your mobile, you can change the info showed in your Nokia's about me page, and many more. :)
You need to hack your phone first, Read Here.
so lets start the tutorial. All you need is a C2Z Patch Generator. Download it and install it.
Then obviously open it :)
Then click on Left Side Button then close your eyes and click first option. I said close your eyes because it's in any other language, and the meaning of first option is Generate C2Z Patch.
Then open memory card and required patch will be in your memory card. Move this patch to the directory E:\patches
Then open Rom Patcher and use you c2z.rmp patch as you want. :)
You need to hack your phone first, Read Here.
so lets start the tutorial. All you need is a C2Z Patch Generator. Download it and install it.
Then click on Left Side Button then close your eyes and click first option. I said close your eyes because it's in any other language, and the meaning of first option is Generate C2Z Patch.
Then open memory card and required patch will be in your memory card. Move this patch to the directory E:\patches
Then open Rom Patcher and use you c2z.rmp patch as you want. :)
To sync music, pictures, videos, and podcasts
1. Using the USB cable, connect your Windows Phone to your Mac. (Windows Phone 7 Connector for Mac should open automatically. In case if it does not, then in the Applications folder, click Windows Phone 7 Connector.)
2. In the left panel, click the type of media you desire to sync (Music, Photos & Videos, Movies & TV Shows, or Podcasts), and then do one of the following:
- If you want to sync music, select the Sync music from iTunes library check box.
- If you want to sync photos and videos, select the Sync photos and videos from iPhoto library check box.
- If you want to sync movies and TV shows, select the Sync movies and TV shows from iTunes library check box.
- If you want to sync podcasts, select the Sync podcasts from iTunes library check box.
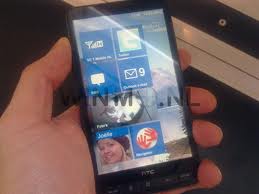
To copy files from your phone to your Mac
To keep a backup of your Windows Phone 7 data and files you can even copy files from your phone to Mac. Selecting an individual files on your phone can be copied or imported to your Mac. For instance, a picture or video on your phone can be imported directly into iPhoto or Aperture on your Mac.
1. Connect your Windows Phone to your Mac using the USB cable provided with the Phone.
2. In the left panel, click Browse Device, then select the files you want to copy.
3. Do one of the following:
- To copy the files to the corresponding library on your Mac click Import Selected Items.
- Drag and drop the files to your Desktop or to a specific folder.
To update your Windows Phone 7 Software
Using Windows Phone 7 Connector, you can also install updates to your phone for Mac. If an existing update is available, then you’ll be notified when you connect your phone to your Mac and start Windows Phone 7 Connector.
- Connect your Windows Phone to your Mac using the USB cable.
- In the left pane, click the device name only not the media type.
Tap Install Updates.
To restore a backup to your phone
Whenever you will update your phone using Windows Phone 7 Connector for Mac, automatically a backup for your Phone Software and settings will be taken for safety. In case if your phone shows any kind of problem after an update, then you can restore your phone to its pre-update version and state.
- Connect your Windows Phone to your Mac using the USB cable came along with your phone.
In the left panel of the screen, click the name of your phone, and then click Device Options.
Click Restore, and then follow the instructions to restore your phone to the most recent backup.


